
Cut Vinyl Lettering / Graphic
Cut Vinyl Lettering/Graphic is an adhesive backed, vinyl graphic where letters and graphic elements are individually cut, held together by transfer tape and applied all at once to windows, vehicles, or other smooth hard surfaces.
- Indoor/Outdoor (weather resistant)
- Unprinted (plain cut vinyl) and printed ink (CMYK) options available
- Individual cut graphic elements and letters
(all remaining background vinyl is removed) - Comes complete with application tape enabling the pieces to be transferred and applied all at once
Note: Not all designs are suited for cut vinyl lettering. There are limitations with small text, thin lines and intricate artwork. It is highly recommended to provide concept artwork when requesting a custom quote.


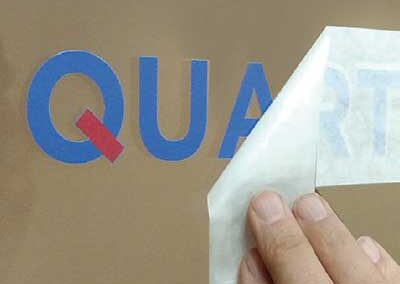
Cut Vinyl Lettering and Graphics are an “old school” method that has been in practice for nearly 40 years. These graphics are made up of three layers. The bottom is simply the paper liner of the graphic (protecting the adhesive), the middle section is the vinyl itself that has been cut in place, and the top layer is a pre-mask application/transfer tape. This pre-mask layer is what holds everything in place and allows you to transfer and install the vinyl pieces as one graphic onto a smooth, hard surface.
Using a digital plotter with a micro-knife, we kiss cut our vinyl graphics with intricate precision. The excess material is “weeded” away (including the inside of letters like “q”, “e”, or other enclosed parts of the art). It’s a time intensive and delicate process but the end result is an appearance that is unmistakeable and simple.

Using Hadrus official templates ensures proper, speedy, accurate production of your job through our semi-automated systems. Templates available include common/popular sizes as well as some unique sizes.
Cut Vinyl Lettering
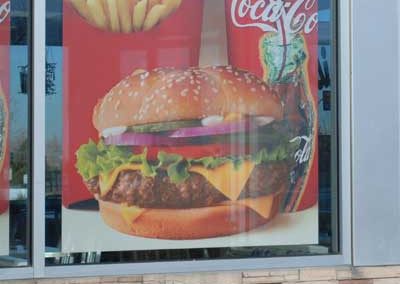
Use: Indoor/outdoor apply to very smooth surfaces like glass, mirrors, office doors, vehicles, etc.
Plain Media: 3mil plain vinyl (white or black only)
Printed Media: 4mil color printed vinyl with laminate
Adhesive: acrylic, medium-tack, permanent
General Application Instructions
For specialty graphics to properly adhere, the application surface must be clean: free of oils, grease, dust, and debris. If the surface has been painted recently, the surface must be allowed to cure for at least 45 days prior to graphic application.
Apply all specialty graphics in temperatures that are neither too hot nor too cold. The optimum temperature for installing is between 65° and 72°F. Graphics can be installed as low as 50° and up to 90°F. Larger outdoor graphics are easier to apply in the protection of shade.
Windows/Glass: Install on a clean and dry surface. Clean glass surface with water or a common glass cleaner. Best practices: A razor-blade scraper with glass cleaner (or water) can be used to remove little bits of crud. Use a paper towel or lint-free rag and wipe glass surface with isopropyl alcohol or denatured alcohol.
Walls: Install on a clean and dry surface. Best practices: wipe dust from wall surface with a clean (slightly damp) cloth and allow to dry. Wall graphics adhere best to walls with gloss paint.
Other Surfaces: For all other applications, make sure surface is clean and dry. Choose a location to test graphic adhesion. Because surface conditions and properties can vary widely, it is ultimately the responsibility of the end user to test the bond and effective removal of the adhesive graphic from the chosen surface.
Method: Use overlapping strokes as you apply the graphic to the surface. If you don’t have an installation squeegee, a stiff plastic (like a credit card) can be helpful to smooth the graphic out during application.
ITEMS
CUTVINYL, CUTVINYL-CUST